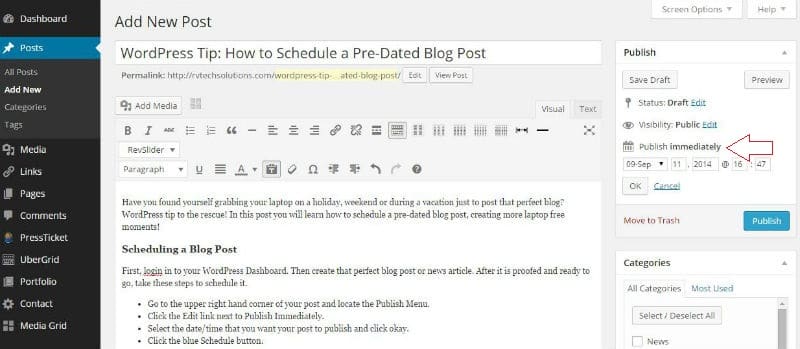
Have you found yourself grabbing your laptop on a holiday, weekend or during a vacation just to post that perfect blog? WordPress tip to the rescue! In this post you will learn how to schedule a pre-dated blog post, creating more laptop free moments!
Scheduling a Blog Post
First, login in to your WordPress Dashboard. Then create that perfect blog post or news article. After it is proofed and ready to go, take these steps to schedule it.
- Go to the upper right hand corner of your post and locate the Publish Menu.
- Click the Edit link next to Publish Immediately.
- Select the date/time that you want your post to publish and click okay.
- Click the blue Schedule button.

It’s as simple as that! Those four easy steps can give you more freedom on your days off! Sweet!
Advantages of Scheduling a Post
Being able to pre-date a post has several advantages. Here are out top 3:
- You can create, finalize and schedule several posts at once, with the ability to choose when they go live. Perfect for a monthly blog schedule!
- You can post a holiday blog to greet your followers directly on that holiday without taking time away from celebrating.
- You can write a series of posts (Part I,II and so on) while the topic is fresh on your mind and schedule them to go live once every two weeks, month, however long you want. Your posts will be more uniform. Additional tip: Be sure to add links at the end of each post linking it to the other posts in the series.
Don’t feel guilty. Free yourself from you laptop! Enjoy your vacation days! WordPress has your back.


